


A mr.cool mini split is a ductless heating and cooling system consisting of an outdoor compressor unit connected to one or more indoor air handlers through a refrigerant line set. Operating without ductwork, mini splits deliver highly efficient, zone-specific climate control for residential rooms, commercial spaces, additions, and any area where traditional ducted HVAC systems are impractical or cost-prohibitive. They heat, cool, and dehumidify from a single compact installation.
The Rise of Mini Split Systems in Modern Climate Control
If you follow trends in residential construction, home renovation, or commercial property improvement, you have almost certainly noticed that ductless climate control has moved from a niche specialty product to a mainstream solution over the past decade. Walk through any recently renovated neighborhood, scan the exterior walls of newly built multifamily buildings, or browse renovation content on any home improvement platform, and the slim wall-mounted indoor units and compact outdoor condensers of mini split systems appear with remarkable frequency.
This growth is not accidental. It reflects a genuine convergence of technological advancement, rising energy costs, changing home layouts, and a growing consumer preference for precision comfort control that central HVAC systems with their single-thermostat, whole-house approach simply cannot replicate. Mini split technology has matured to the point where it now offers better efficiency, better comfort control, and in many applications, lower total installation cost than the ducted systems it increasingly replaces.
Understanding the full landscape of mini split technology — from how the underlying refrigerant cycle works to how to select, size, install, and maintain a system for a specific application — empowers homeowners, contractors, and facility managers to make better decisions about one of the most important infrastructure investments in any property.
How Mini Split Systems Work
The Refrigerant Cycle: Moving Heat, Not Making It
The fundamental operating principle of a mini split is the same as every other refrigeration-based climate system: thermal energy is moved from one place to another rather than being generated through combustion or electric resistance. This distinction is what makes mini splits so much more efficient than conventional heating and cooling alternatives, and understanding it helps explain why the technology consistently outperforms on energy consumption metrics.
In cooling mode, warm indoor air is drawn across the indoor air handler's evaporator coil, which is kept at a low temperature by refrigerant circulating at low pressure. The refrigerant absorbs heat from the indoor air as it passes over the coil, causing that air to cool before it is distributed back into the room. The refrigerant, now carrying the heat absorbed from the indoor air, travels through insulated refrigerant lines to the outdoor unit, where the compressor pressurizes it. This pressurized, heat-laden refrigerant passes through the outdoor condenser coil, releasing its thermal energy into the exterior air with the help of a condenser fan. The refrigerant is then cooled and expanded before returning to the indoor coil to begin the cycle again.
In heating mode, a component called the reversing valve redirects refrigerant flow so that the outdoor coil becomes the evaporator, absorbing heat from the outside air even in cold conditions. The indoor coil then acts as the condenser, releasing that captured heat energy into the living space. This heat-pump operation allows modern mini splits to deliver two to four units of heat energy for every unit of electricity consumed — a performance ratio that no electric resistance heating system can match.
Inverter Compressors and Variable-Speed Operation
The technology that elevated mini split systems from a functional HVAC option to an efficiency leader is the variable-speed inverter compressor, which became standard in premium ductless systems over the past decade and is now common even in mid-tier products. Unlike the fixed-speed compressors used in older HVAC equipment that can only run at 100 percent capacity or be completely off, an inverter compressor adjusts its speed continuously based on the current demand for heating or cooling.
When a room is far from its target temperature, the inverter compressor runs at high speed to bring conditions into range quickly. As the room approaches the set point, it gradually reduces its output to a low maintenance speed that keeps the temperature precisely stable without the thermal oscillation that on-off cycling creates. This variable-speed operation produces noticeably more stable and comfortable indoor temperatures while using significantly less electricity, because the compressor avoids the high-energy startup surge that occurs every time a fixed-speed compressor cycles on.
The Core Advantages of Mini Split Systems
Elimination of Ductwork Losses
The efficiency gap between ducted and ductless systems begins with a simple but consequential fact: ducts lose energy. The conditioned air that a central HVAC system produces must travel through ductwork that passes through unconditioned attic spaces, crawlspaces, and wall cavities where temperatures may be 30 to 60 degrees different from the target room temperature. Every foot of duct run loses some of the conditioning invested in the air traveling through it, and every duct joint and seam leaks some conditioned air into spaces where it does no useful work.
Industry studies have consistently found that ducted systems lose 20 to 40 percent of their conditioned air output before it reaches the intended living space. A mini split system eliminates all of these losses because the refrigerant circuit — not an air duct — carries the thermal energy directly from the outdoor unit to the indoor air handler in the target room. All of the system's conditioning capacity goes directly into serving the space, with no duct loss penalty.
Precise Zone-by-Zone Comfort Control
Multi-zone mini split systems allow each room or zone served by an indoor air handler to maintain its own independent temperature setting simultaneously. The home office can be kept at 68°F while the master bedroom is at 72°F and the living room is at 70°F — all from a single outdoor condenser unit, all operating concurrently, all adjustable independently without affecting the other zones. This level of precision is simply not achievable with a single-thermostat central HVAC system, which distributes the same conditioned air to every room and cannot differentiate between spaces with different occupancy patterns, sun exposure, or comfort preferences.
Beyond comfort personalization, zone control has direct energy efficiency implications. Unoccupied rooms can be allowed to drift to wider temperature setbacks without affecting the comfort of occupied spaces, and zones with different thermal loads — a sun-drenched sunroom versus a shaded north-facing bedroom — can receive precisely the conditioning they need rather than the averaged output of a system designed for the whole house.
Indoor Air Quality and Quiet Operation
The air distribution path of a central ducted system is also its primary indoor air quality weakness. Ducts that have accumulated years of dust, debris, pet dander, mold spores, and other contaminants become a distribution network for those pollutants every time the system runs. Even well-maintained duct systems harbor more contamination than the direct room-to-room recirculation that a mini split air handler provides.
Mini split indoor air handlers circulate and filter the air within the single room they serve, avoiding cross-contamination between spaces. Most units incorporate multi-layer filtration that captures fine particles, and premium models include additional treatment stages such as activated carbon filters, ionization, or photocatalytic panels that address odors, volatile organic compounds, and biological contaminants. The result is cleaner air in the conditioned space than ducted alternatives typically provide.
The operational noise profile of a mini split is also a genuine advantage in residential applications. Most indoor air handlers operate between 19 and 38 decibels — roughly equivalent to the ambient noise level of a quiet room or soft whisper — compared to the audible rushing air and mechanical noise of forced-air duct systems. This quiet operation makes mini splits particularly well-suited to bedrooms, nurseries, home offices, and media rooms where sound sensitivity is a priority.
Choosing the Right Mini Split for Your Application
Single-Zone Versus Multi-Zone Systems
The first configuration decision for any mini split installation is whether a single-zone or multi-zone system is appropriate. A single-zone system pairs one outdoor condenser with one indoor air handler and is the right choice when the goal is to condition a single space — a room addition, a converted garage, a detached guest suite, or any discrete area that needs independent climate control. Single-zone systems are available in capacities from 6,000 BTU to 36,000 BTU and can be sized precisely for nearly any room dimension.
A multi-zone system connects one outdoor condenser to multiple indoor air handlers, typically between two and eight depending on the outdoor unit's total capacity. Multi-zone systems are appropriate when the goal is to serve multiple rooms from a single outdoor installation — either to reduce the number of outdoor units on a building's exterior or to take advantage of the cost efficiency of sharing one compressor across several zones. Each indoor handler in a multi-zone system operates independently, serving its designated space at its own set temperature, while the outdoor unit manages total system capacity dynamically based on aggregate demand.
Selecting Capacity: The Importance of Correct Sizing
Mini split sizing is driven by the BTU capacity required to maintain comfortable temperatures in the target space under the worst expected conditions — peak summer heat for cooling capacity and peak winter cold for heating capacity. The widely used rule of thumb of 20 BTU per square foot of conditioned space provides a useful starting point but requires adjustment for factors that significantly affect actual thermal loads.
Rooms with high ceilings require more capacity per square foot than rooms with standard eight-foot ceilings because there is more air volume to condition. Spaces with large areas of south- or west-facing glass have higher cooling loads than shaded or north-facing rooms. Poorly insulated walls, uninsulated attics overhead, and concrete or masonry exterior walls all increase load compared to well-insulated wood-frame construction. In commercial applications, occupant density, lighting loads, and equipment heat generation add substantial additional load that must be factored into sizing calculations.
For most residential applications, a properly conducted Manual J load calculation — the industry-standard methodology for determining accurate HVAC system sizing — will produce a BTU requirement recommendation that accounts for all of these factors specifically for the target space and climate location. Many HVAC professionals and some distributor platforms offer load calculation services that provide this analysis either free or at modest cost as part of the equipment selection process.
Understanding Efficiency Ratings: SEER, HSPF, and COP
Three efficiency metrics are relevant when comparing mini split systems. The SEER (Seasonal Energy Efficiency Ratio) measures how efficiently the system cools across a representative cooling season and is the most commonly cited metric for comparing air conditioning performance. Higher SEER ratings indicate greater efficiency during cooling operation. Federal minimum standards for new mini splits are currently set at SEER 15 in most regions, while premium systems achieve SEER ratings of 20 to 28 or above.
The HSPF (Heating Seasonal Performance Factor) measures heating efficiency across a representative heating season and is the appropriate metric for comparing heat pump performance in climates where heating demand is significant. Current federal minimums require HSPF of at least 8.8, while top-performing systems achieve HSPF ratings of 11 to 13 or higher. In cold-climate applications, the HSPF rating should carry substantial weight in the purchasing decision because heating costs often represent a larger annual energy expenditure than cooling costs.
The COP (Coefficient of Performance) expresses how many units of heat energy are delivered for each unit of electrical energy consumed at a specific operating condition — often 47°F for standard ratings or 17°F for cold-climate ratings. A COP of 3.0 means the system delivers three units of heat for each unit of electricity, which is impossible with resistance heating but routine for a well-designed mini split heat pump.
Installation: From Planning to First Operation
Pre-Installation Planning and Site Selection
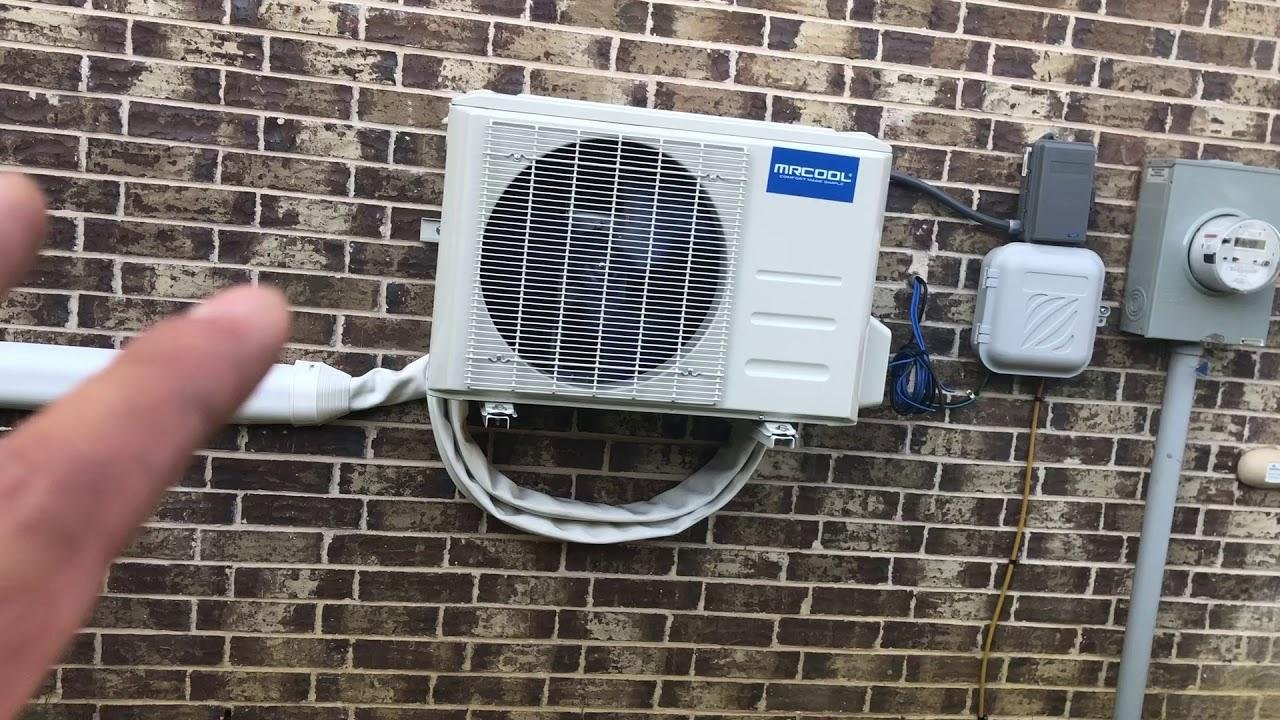
A successful mini split installation depends on thoughtful pre-installation planning that considers the location of both the indoor and outdoor units, the routing of the interconnecting conduit, the electrical supply requirements, and the drain line path for condensate removal. The indoor air handler's position determines how effectively conditioned air is distributed through the space — mounting too low reduces coverage, mounting in a corner limits distribution, and mounting directly above occupant zones can create uncomfortable direct airflow.
The outdoor condenser placement requires a stable, level surface with adequate clearance on all sides for airflow — typically 12 to 18 inches on the intake sides and more on the discharge side. The outdoor unit should be positioned to minimize the length of the refrigerant line set run to the indoor unit, as longer line sets slightly reduce system efficiency and add installation cost. It should also be positioned away from areas where it might be physically damaged by vehicle traffic, yard equipment, or snow accumulation from roof overhangs.
The Installation Process for Pre-Charged DIY Systems
Modern mini split systems designed for homeowner installation come factory pre-charged with refrigerant in sealed line sets, eliminating the need for EPA certification or professional refrigerant handling during installation. The physical installation process involves mounting the indoor wall bracket, drilling the conduit hole, mounting the indoor unit, running the conduit to the exterior, placing and securing the outdoor unit, connecting the refrigerant line set, routing the condensate drain, and making the required electrical connections.
The electrical work — running a dedicated circuit from the main panel to the outdoor unit, sized per the manufacturer's amperage specifications — is typically the most technically demanding element of DIY installation. Many homeowners who are comfortable with the mechanical aspects of the installation choose to engage a licensed electrician for this specific portion of the work, which is a sensible approach that ensures both safety and code compliance for what is often the most consequential step in the process.
Post-Installation Testing and Commissioning
With all connections completed and the electrical supply energized, the system should be tested across all of its operating modes before the installation is considered complete. Cycling through cooling mode, heating mode, fan-only mode, and dehumidification mode confirms that all refrigerant circuit components are functioning correctly, that the indoor air handler's fan is operating at all speed settings, and that the remote control or smart app interface is properly paired and responsive. Checking that the condensate drain is flowing correctly during cooling mode operation is a particularly important verification step, since blocked drains are one of the most common sources of water damage in mini split installations.
Maintaining Your Mini Split for Long-Term Performance
Essential Routine Maintenance
The maintenance requirements of a mini split system are genuinely modest compared to central ducted systems, but they are not zero. The most important routine task is keeping the indoor air handler's filters clean. Most units have slide-out filter panels accessible without tools, and the filters can be vacuumed or rinsed under warm water, dried, and reinserted in minutes. During periods of heavy use, this task should be performed every two to four weeks to maintain airflow and efficiency.
Annual maintenance should include inspection and gentle cleaning of the evaporator coil inside the indoor unit, inspection and cleaning of the outdoor condenser coil, checking that the condensate drain line is clear and draining properly, and a visual inspection of the refrigerant line set for signs of damage or insulation deterioration. Most homeowners can perform these tasks themselves, though scheduling an annual service visit from a qualified HVAC technician provides additional diagnostic value through refrigerant pressure checks and electrical inspection that require specialized equipment.
Frequently Asked Questions
How much does a mini split system cost to install? Equipment costs for a single-zone mini split range from approximately $700 to $2,500 depending on capacity and efficiency rating. DIY installation adds relatively modest material costs. Professional installation typically adds $1,000 to $3,000 in labor depending on the complexity of the installation and regional labor rates. Multi-zone systems cost proportionally more, with professionally installed whole-home systems ranging from $5,000 to $15,000 or above based on the number of zones and system capacity.
Can a mini split heat a home effectively in very cold weather? Standard mini splits maintain good heating performance down to outdoor temperatures of about 5°F to 15°F. For climates with regularly extreme cold below these temperatures, cold-climate or hyper-heat mini split models are specifically designed to deliver strong heating output at outdoor temperatures as low as -13°F or below. These systems are the appropriate choice for northern climates where reliable winter heating performance is essential and where standard models would struggle to maintain efficiency.
How long does a mini split system typically last? With proper maintenance, mini split systems routinely achieve service lives of 15 to 20 years. The outdoor compressor is the component most subject to wear over time, while indoor air handlers typically last the full system lifespan without requiring replacement. Consistent filter cleaning, annual coil maintenance, and protection of the outdoor unit from physical damage are the primary factors that influence how close a system comes to its potential maximum lifespan.
Are mini splits compatible with smart home systems? Most current-generation mini split systems include Wi-Fi connectivity that allows control through dedicated smartphone apps, and many are compatible with voice assistant platforms. Some systems also integrate with third-party smart home platforms through direct integration or compatibility bridges. The sophistication of smart home integration varies by brand and model, so buyers who prioritize smart home compatibility should confirm specific platform compatibility before purchasing.
Do mini splits work well in high-humidity climates? Yes. Mini splits operate effectively in high-humidity environments and in fact provide active dehumidification as part of their cooling operation, as moisture condenses on the cold evaporator coil and drains away through the condensate drain. Most systems also include a dedicated dry or dehumidification mode that reduces humidity without aggressive cooling, which is useful in humid but moderate-temperature conditions. The direct room-to-room air circulation of a ductless system also prevents the cross-contamination of humidity between spaces that can occur in ducted systems.
Author Bio: Thomas Brennan is an HVAC systems engineer and technical writer with over eighteen years of experience designing, installing, and evaluating residential and commercial climate control systems across a wide range of applications and climates.